Indoor Centerpieces
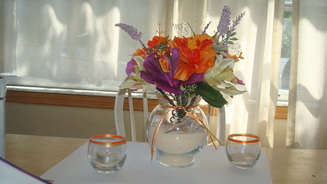
Third and final mock up
 |
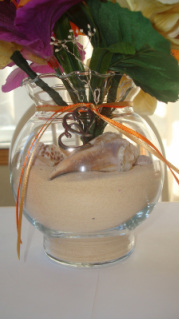 |
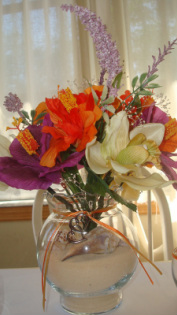
Outdoor Centerpieces
|
|
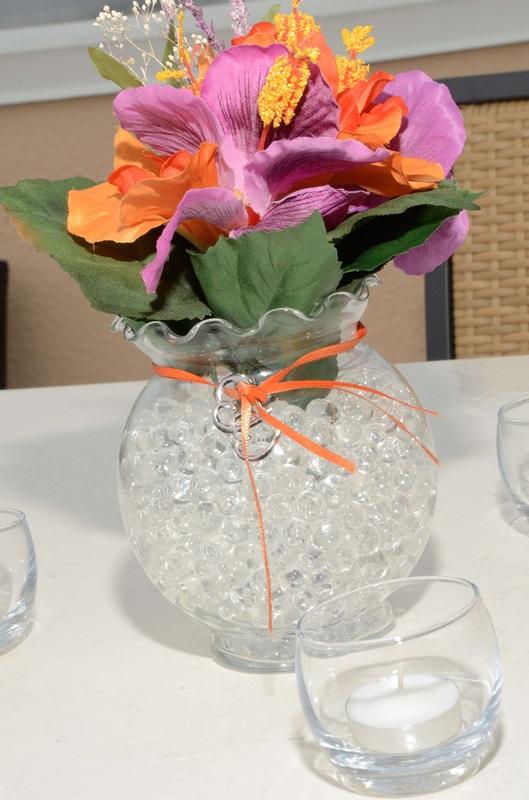
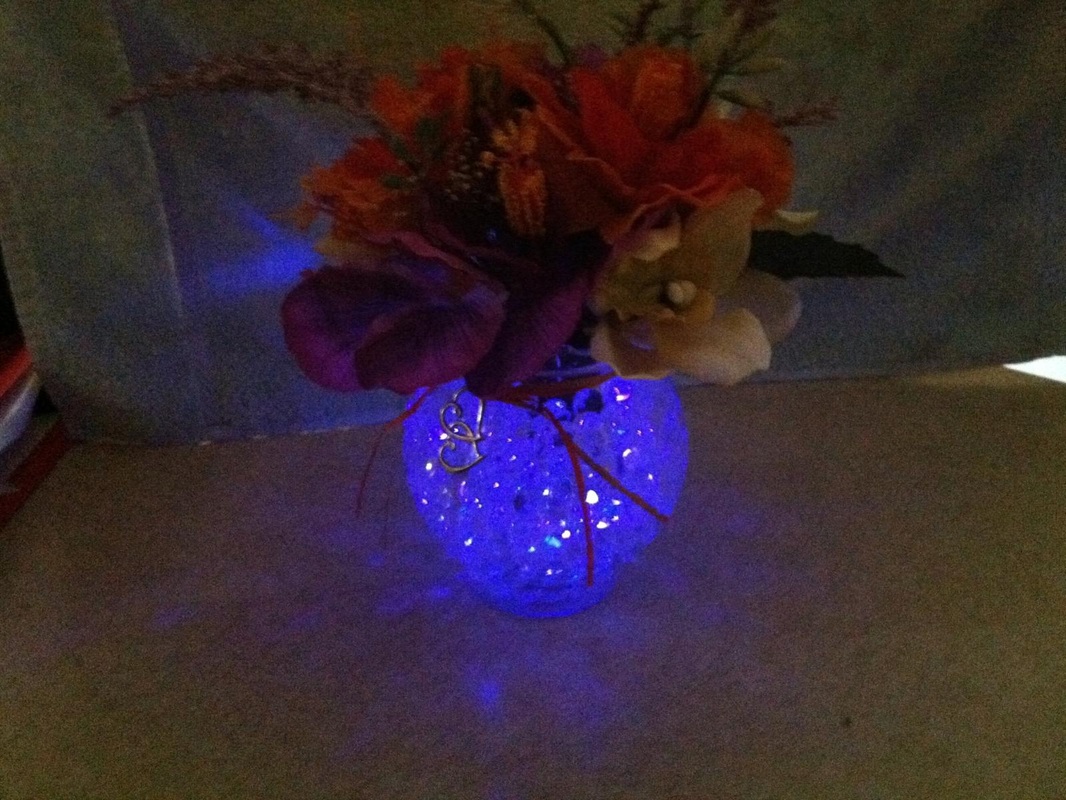
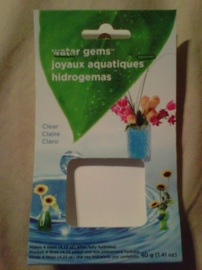
I saw a lot of brides using these bubble looking things with lights and thought they looked really cool so I did some research. They are called Water Beads or Water Gems and come dehydrated and hydrated. I suggest getting dehydrated gems and adding the water yourself. They are much cheaper and don't take up any extra space. The best deal for me was Walmart. They cost about $2.50 to $3.00 for 4 liters compared to $10 for 2 liters of hydrated gems at the craft store. These gems can be used with silk or real flowers and come in many different colors.
Materials:
Steps:
When you are done using your water gems dispose of them accordingly. DO NOT poor down your drains because they absorb water and may clog your pipes.
Materials:
- Vase of your choice
- Dehydrated Water Gems
- Flowers of your choice
- Submersible LED lights (color of your choice)
Steps:
- Depending on the brand of water gems you get the next few steps will be different just follow directions on the back of the package. If you bought the same ones I did, add 1 liter of water per 10 grams of water gems. ( I used 20 grams total for my centerpieces)
- Allow them to soak for 4 to 6 hours. I let mine sit over night just to make sure they were as uniform as possible.
- Drain excess water.
- Depending on the size of your vase you might need to buy more then one bag of water gems. 1 bag will give you about 4 liters of Water Gems.
- Turn on LED and place at the bottom of the vase (depending on the vase size you may need to use more than one).
- Pour desired amount of water gems into vase and add flowers.
- If gems begin to dry out just add more water
When you are done using your water gems dispose of them accordingly. DO NOT poor down your drains because they absorb water and may clog your pipes.
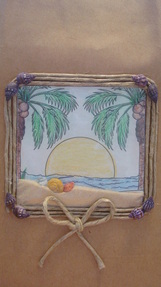
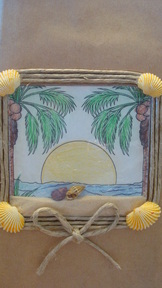
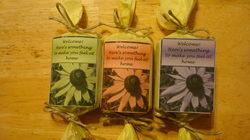
Welcome Bags

Materials:
- Paper bags
- 3" by 4" candy bags
- Mutli-colored shells
- Sand
- Beach picture
- Hemp rope
- Hot glue gun
Steps:
- Print out beach pictures in 3" by 3" size ( I used a coloring book page and colored in the details)
- After picture is colored place inside candy bag and put 1/4 tsp of sand and 2 small shells into bag.
- Fold extra plastic over and tape down
- Hot glue the square to the middle of the bag
- Hot glue hemp rope around picture to cover seems
- Hot glue shells to corners
- Make a bow and hot glue under the center of photo
- Sit back and enjoy!
 |
 |
 |
 |
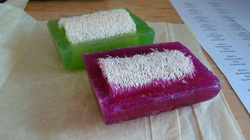
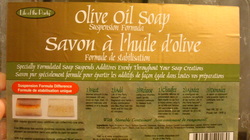
Homemade Soaps for OOT Bags
 |
 |
 |
 |
 |
 |
Materials:
- Soap base
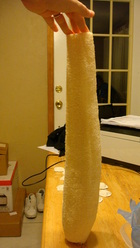
- Large loofa
- Green, red and purple soap dye
- Jasmine, Eucalyptus and tropical soap scents
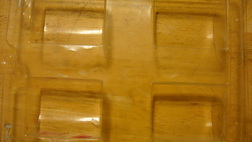
- Soap mold
- Tissue paper
- Hemp rope
- Cut loofa in half long ways to make one side flat
- Then cut loofa into 1 to 2 inch sections
- Melt soap base using a double boiler and add desired amounts of scent and color.
- Fill soap molds 2/3rds of the way up and add loofa half
- Carefully fill the rest of the soap mold, making sure to keep the loofa centered.
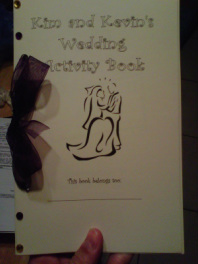
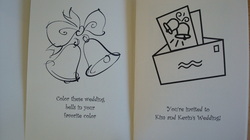
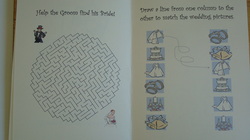
Activity Books for Kids
 |
 |
 |
 |
Below is the Activity Book template I am using. The page is formated in Microsoft Office Word. To change the name on the first page put your mouse over the name then right click and click edit text. The book is designed to have 2 pages printed on one paper.
| activity_book.docx |
Table photo holders
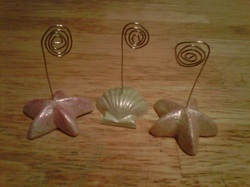
Instead of using table numbers we are using pictures of places we have been. I had a hard time finding holders that I liked until I saw a how-to on Michaels.com.
Materials:
- Air Dry Clay
- Shell Candy Mold
- Jewelry Wire
- Iridescent Nail Polish
- Sand Paper
- Take a small piece of air dry clay and kneed it for a few seconds in your hands.
- Place the clay into the shell mold, making sure to remove all the air bubbles
- Let dry for at least an hour then carefully remove from mold
- The clay will still be soft.
- Cut 5 to 6 inches of wire and bend one end to a 90 degree angle
- Carefully stick the end with the angle into the center of the clay shell and let dry over night.
- Once dry sand off rough edges and paint with nail polish.
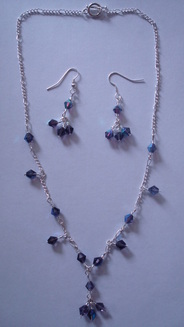
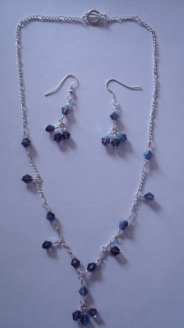
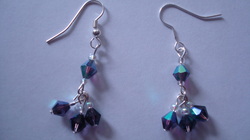
Bridesmaid Jewelry
 |
 |
 |
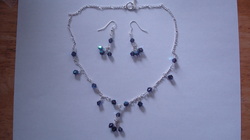 |
Materials:
- 22, 6mm bicone crystals
- 12, 3/4" headpins
- 9, 2" eye pins
- 2 earrings
- Chain of your preference
- 4mm jump rings
- Pointed jewelry pliers
- If interested in learning how to make these please contact me and I will send you the information.
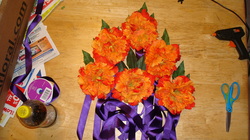
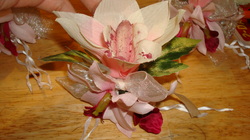
Boutonnieres
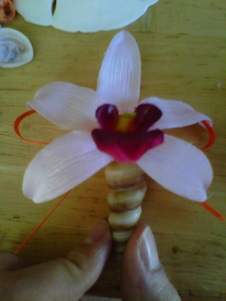
Materials:
- Swirl Shell
- Silk orchid
- Ribbon
- 1 1/2" bar pin
- Hot glue gun
- Make bows from ribbon about 2 1/2 inches wide
- Hot glue bow to the back of orchid
- Fill shell with hot glue and place flower with bow inside
- Hot glue bar pin to the back
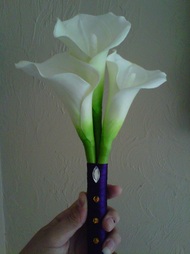
My Bouquet
 |
 |
Materials:
- 3 real touch calla lilies
- Desired colored ribbon
- Gem stones
- Cutting Pliers
- Scissors
- Floral tape
- Use the cutting pliers to cut the calla lily stems to your desired length
- Use floral tape to secure them together
- Wrap stems with ribbon
- Add gems
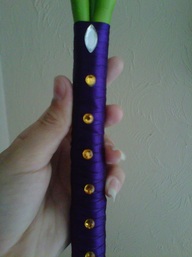
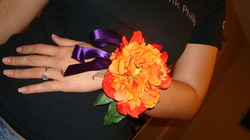
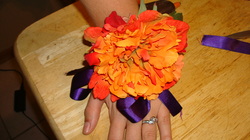
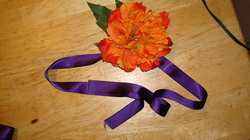
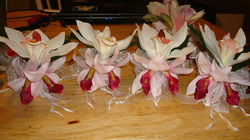
Bridesmaid Corsages
 |
 |
 |
 |
Materials:
- Large silk flower
- Large leaf from flower stem
- 2 feet of 7/8 inch (22.2 m) ribbon
- Hot glue gun
- Cut flower as close to the bottom of the bud as possible
- Hot glue leaf to the bottom of the flower
- Cut ribbon in 2 feet increments
- Create a crease in the middle of the ribbon
- Place a line of hot glue on crease and attach to flower
- Gently lift ribbon to expose any areas not attached and glue accordingly
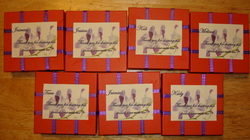
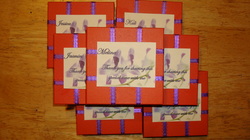
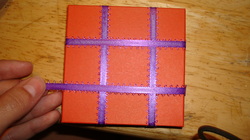
Jewelry Box
 |
 |
|
Photo 1
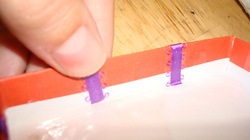 |
Photo 2
 |
|
Photo 3
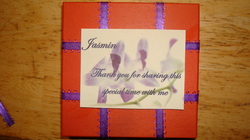 |
Photo 4
 |
| bridesmaid_jewelry_tags.docx |
Materials:
- Standard blank jewelry box
- decorative 5mm Ribbon
- Clear tape
- DIY Jewelry tag (above)
- Glue
- Print out labels and cut to size
- Attach a small piece of tape to the end of the ribbon then attach to inside of jewelry box cover, as shown in Photo 1.
- Stretch ribbon over cover and cut so that about 1/2 inch is hanging over the edge, as shown in Photo 2.
- Attach a piece of tape to the cut end of the ribbon and stick it to the inside cover.
- Repeat first 3 steps to create desired effect
- Glue labels over ribbon, as shown in Photo 3
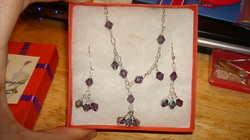
- Position jewelry inside box, as shown in Photo 4
- Enjoy your final product :)
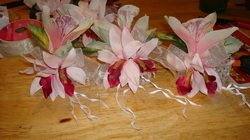
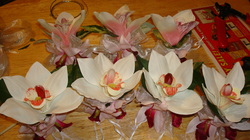
Mother's Corsages
  |
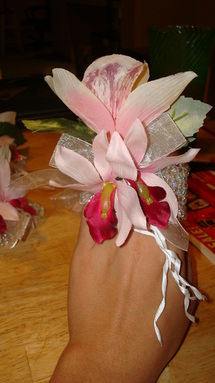 |
Materials:
- Flower Bracelet (got mine really cheap at afloral.com
- Sheer ivory ribbon 7/8 inch (22.2 mm) wide
- Hot glue gun
- 1 Large pink Cymbidium Orchid with leaves
- 2 Small pink Cymbidium Orchid
- Turn bracelet inside out so that plastic pad faces out
- Hot glue Large Orchid with leaves to the center of the plastic pad
- Cut approximately 12 inches of ribbon and make into a bow
- Hot glue bow to the front of Large Orchid
- Hot glue small orchids to either side of large orchid
- Un-tape ribbon on the back of plastic plate
Grandmother's Corsages
  |
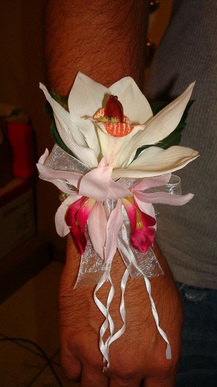 |
My brother was kind enough to model this one for me lol
Materials:
Materials:
- Flower Bracelet (got mine really cheap at afloral.com
- Sheer ivory ribbon 7/8 inch (22.2 mm) wide
- Hot glue gun
- 1 Large white Cymbidium Orchid with leaves
- 2 Small pink Cymbidium Orchid
- Turn bracelet inside out so that plastic pad faces out
- Hot glue Large Orchid with leaves to the center of the plastic pad
- Cut approximately 12 inches of ribbon and make into a bow
- Hot glue bow to the front of Large Orchid
- Hot glue small orchids to either side of large orchid
- Un-tape ribbon on the back of plastic plate
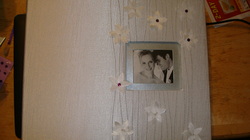
Guest Book
 |
 |
This book was really simple. My fiancée and I wanted something that we would be compelled to look at later. My fiancée had the idea of adding blank pages to the front of a photo album, that way whenever we wanted to look at our wedding photos we could see our guest book as well. We ended up choosing a scrapbook instead of the photo album because it was easier to add and subtract pages from. We got this 12X12 book at Michaels using a 40% off coupon. I printed out a cute guest book poem and glued it to the inside cover. Then I hot glued ribbon around the edges. Some of the pearls on the cover got broken as I added the blank pages to the front so I used the sticker gems I got for the kids activity books and we are very happy with the result. My fiancée didn't even realize they weren't meant to be there until I told him.
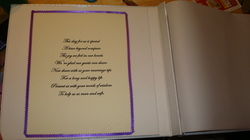
Poem:
This day for us is special
A time beyond compare
The joy we feel in our hearts
We're glad our guests can share.
Now share with us your marriage tips
For a long and happy life
Present us with your words of wisdom
To help us as man and wife
Poem:
This day for us is special
A time beyond compare
The joy we feel in our hearts
We're glad our guests can share.
Now share with us your marriage tips
For a long and happy life
Present us with your words of wisdom
To help us as man and wife
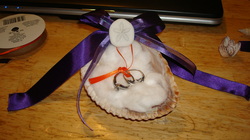
Ring Bearer Shell
 |
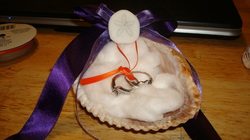 |
Keeping with our beach theme I decided to use a shell instead of a typical pillow.
Material:
Material:
- 1 Large shell (got this one from a local island)
- Approximately 1 1/2 feet of 7/8 inch (22.2 mm) dark purple ribbon
- Approximately 11 inches of 3/8 inch (9mm) decorative ribbon
- Approximately 8 inches of 3mm orange ribbon
- Sand dollar biscuit
- 5 cotton balls
- Hot glue gun
- Make a large bow out of the 7/8 inch ribbon
- Make a small bow out of the 3/8 inch ribbon
- Tie orange ribbon to small bow
- Hot glue small ribbon to large ribbon
- Hot glue large ribbon to top of shell
- Hot glue sand dollar biscuit to the center of the small bow
- Stuff 2 full cotton balls in the back of the shell
- Break apart remaining cotton balls and place inside shell
- Add fake rings and your done! :)
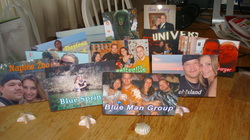
Table Pictures (table numbers)
 |
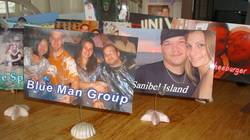 |
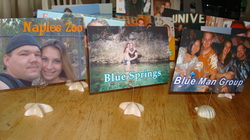
Instead of table numbers we decided to use pictures of places we have been. I used a photo editing program that came with my Canon Pixima printer. If you dont have a picture editing program Paint or Power Point work well too.
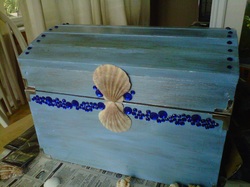
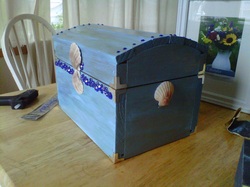
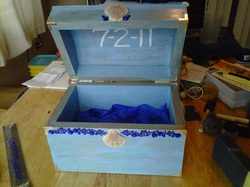
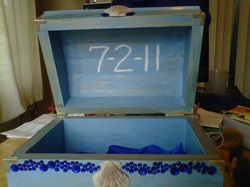
Keepsake Treasure Chest
 |
 |
 |
 |
 |
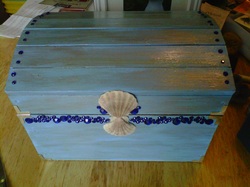 |
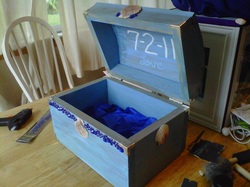
I made this for a local bride for her wedding on the second of July. It took me about 3 days to complete and I think she is going to love it!
Materials:
Materials:
- Unfinished Treasure Chest
- 1 bottle Blue Heaven acrylic paint
- 2 bottles of Brushed Pewter Distress crackle paint
- 1 Bottle white acrylic paint
- 12 silver corner ends
- Sand paper
- Key
- Shells
- Royal blue stick on gems
- Royal Blue tissue paper or fabric
- Foam paint brushes
- Detail paint brush
- Hot glue gun
- Use key to scratch up surface of chest making sure to cover all sides
- Sand down entire chest to remove any splinters
- Use a foam brush to cover entire chest in a light coat of blue paint
- Let dry
- Cover entire chest with a thin layer of crackle paint
- Let dry
- Add extra crackle paint where needed to give desired effect
- Let dry completely
- Use sand paper to rough up corner ends and apply using a small amount of hot glue.
- Use hot glue gun to attach shells and gems where desired
- Use white paint to add date or text to the inside
- Crumple tissue paper or fabric and lay inside
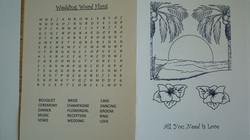
Wedding Map
Along with creating an online map via Weddingmapper.com for our guests, I decided to make a paper map to go into the Welcome Bags for our OOT guests. The map shows directions from the hotel to our venue. It was super easy! I used this wonderful link http://www.weddingbee.com/2009/04/06/making-your-own-map/ and got it done in a few minutes.
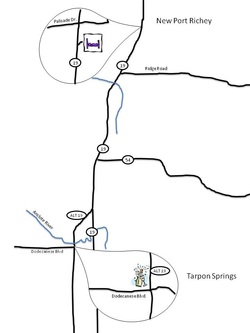
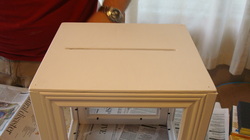
Photo Frame Card Box
Kevin and I wanted a card box that we could either display or use again. So after much googling we decided to go with a photo frame card box.
Materials:
Steps:
Materials:
- Four 8x10 frames
- 32 finishing nails
- Wood glue
- Small screwdriver with a flat end
- Hammer
- Painters tape
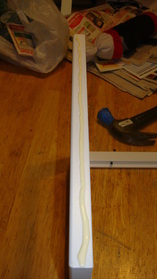
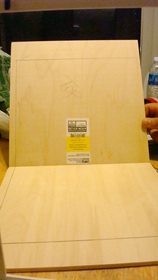
- 2 pieces of Balsa wood
- White paint
- Wood putty
- Saw
- Lazy susanne
- Decorations (ribbon, shells, whatever you like)
Steps:
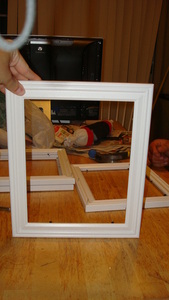 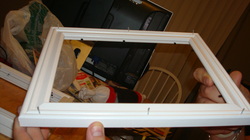 |
Remove the glass and cardboard and clean frames.
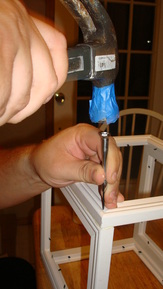
Put painters tape around the end of the hammer to avoid scuffing frames. Put 6 finishing nails in 2 frames, spaced evenly apart. |
  |
Do a trial run to see how the frames will come together.
Place a solid line of wood glue on both the vertical frames. Place the frame with the nails over the glued frames making sure the ends are lined up. The next few steps took the both of us to do :) |
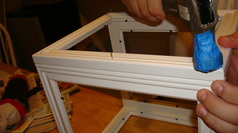  |
While I held one end Kevin hammered the nails down.
Repeat with the second side. After all four frames are attached to each other, Kevin used the small screwdriver to hammer the finishing nails down to hide them. |
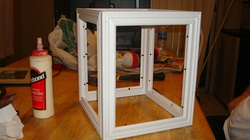 |
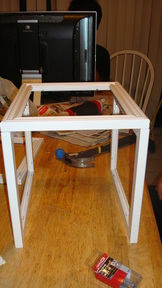
Congrats your half way done! lol Allow the wood glue to dry over night.
|
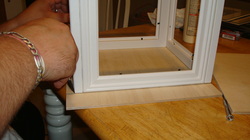 |
Place the frames over the Balsa wood and trace the outline. Mark which piece of wood is for the top.
|
 |
Use the saw to cut out the correct square and a slit in the center of the top piece.
|
 |
Nail the piece you chose for the top on.
Fill nail holes with wood putty and paint. |
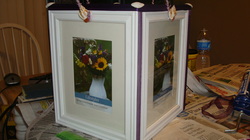 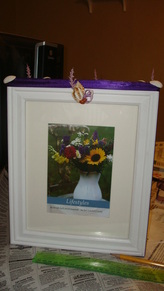 |
Add your decorations and assemble frames.
If you have pictures, insert them and use the last 2 screws to attach the bottom piece of wood. You can use more but it might be harder to open it after the wedding. Once complete attach the lazy susanne and your done! |
Panel Fan Programs
 |
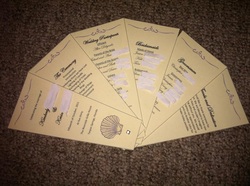 |
I fell in love with the panel fan idea for programs but couldn't find a template that I liked, so I decided to try and make one myself. It turned out to be easier then I thought and I love the end result!
| program_template.docx |
Materials:
Steps:
- Cardstock paper
- Brads (scrapbook embellishments)
- Scissors
- 2.0mm precision screwdriver or a 1/8 hole punch
- Hammer (not needed if using hole punch)
Steps:
- Fill in template with your information
- Print and cut out panels
- Place panels in your desired order
- Punch hole 1/2" from bottom
- If using a screwdriver place panels on carpet and hit once firmly with hammer to create hole.
- Insert brad and fold back ends to secure
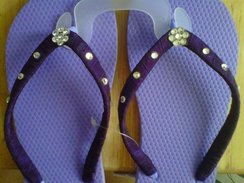
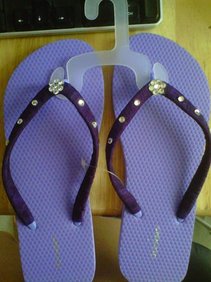
Bridesmaid Flip Flops
|
|
I found shoes online for my girls but none of them were able to try them on before the deadline to order them came. So I decided to dress up flip flops for them just in case the shoes were uncomfortable. I'm glad I did this because the girls loved them and they were able to dance all night long without getting blisters or being uncomfortable.
Materials:
Steps:
Materials:
- Flip flops of the color of your choice (I got mine from Old Navy during their $1 sale)
- Ribbon of your choice (I chose sheer ribbon because my bridesmaid dresses are chiffon)
- Hot glue gun
- Crystals
Steps:
- Put a small dab of hot glue on the end of the ribbon and secure it to the bottom side of the top of the flip flop
- Wrap the ribbon tightly around the top of the flip flop
- Optional: you can wrap the toe separator if you like, I personally thought it was uncomfortable.
- Depending on the color and material of your ribbon you may have to wrap them more then once.
- Once entire top is wrapped, hot glue ribbon to secure.
- Position crystals in desired areas and hot glue to secure.
Hairpiece
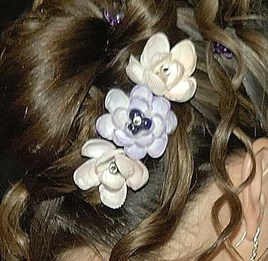
I originally wanted to make my bouquet out of shell flowers but I didn't want the typical look of a bunch of single shells. So after a long hour of searching on Google I found a few pictures of shells that were positioned to look like actual flowers. I made a few test pieces and decided that they would work better as a hairpiece.
Materials:
Optional:
Steps:
Materials:
- Small shells (white or colored)
- Hot glue gun
- beads (colors of your choice)
- Hair clip
- White felt
Optional:
- Ink pad (color of your choice)
- small paint brush
Steps:
- Arrange 3 shells to become the center of the flower
- Hot glue shells to each other and hot glue beads in the center to create the illusion of the stigma.
- Hot glue small shells one by one around the center 3 shells.
- Gradually add larger shells to create a petal effect.
- You can add as many or a little shells as you want. The more you add the larger the flower becomes
- Cut out a circle out of the felt that matches the bottom of the shell flower.
- Once you are happy with your flowers shape hot glue to hair clip
- Glue felt piece under the top of the clip to hide the bottom of the shells.
- If the shells are white but you would like to add color rub paint brush over ink pad and gently brush color over shells. Repeat until desired color is obtained.
